The modifications depicted on these
pages are solely my own applications and if you want to try them, you do it at your
own risk. I cannot be held responsible for any damage or mishap.
The stock gauge cluster
of the European Focus is simple and straightforward. Being simple is not bad
but time to time I need a change. First I bought a stainless steel bezel from
Ebay. The application should be simple but it turned out that it is very
difficult. I tried to place the bezel from the back after removing the front
part of the cluster but this was not possible. To be able to place the bezel
you must use a tool like Dremel to separate the front glass (actually not a
glass, a sort of transparent plastic, maybe policarbonat) from the rest of the
cluster. This was very risky because I was not experienced in using Dremel-like
tools for such works. Besides this there was the risk of plastic particles entering
sensitive parts of the instrument cluster.
When planing
modifications to the instrument panel, you should always bear in mind that if
something goes wrong you most probably won’t be able to buy spare parts and
have to replace the whole cluster. So be careful!
So, what should I do?
After some thoughts I decided to cut the bezel into two piees and then place it
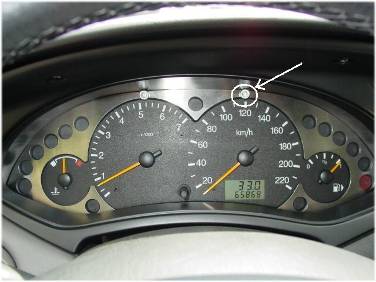
from the back of the front part of the cluster. Where should I cut it? Using
metal scissors I cut it at the most thin points. One of them is highlighted
with a white circle in the picture below. The other is just at the opposite
(down) point (under the odometer display), invisible due to the black cowling.
The bezel has been placed as two pieces and secured at place using some double
sided thin tape. The fake bolts with double sided mounting tape were just the
right things for the camouflage of the cut point. For the sake of symmetry I
placed another fake bolt at the left.
After some time, I found
a nice but cheap Indiglo reverse glow gaugeface on Ebay. I bought it for USD
19. To mount this gaugeface you have to take apart the whole gauge cluster but
you can leave the needles in place. In fact you must do your best to NOT remove
the needles because it is very difficult to calibrate them afterwards.
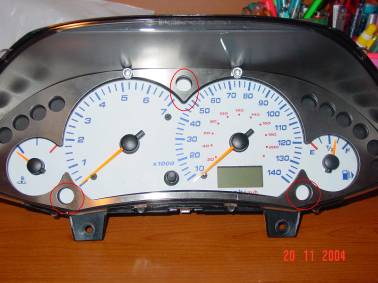
Here yo can see the red
circles where the gougeface should have openings but it is possible to cut out
these circles. One of the vital points when making modifications to the instrument
cluster is that you should NEVER place the cluster face down!
The reverse glow
gaugeface requires alternating current at approximately 100 V and some kHz.
This is generated using a small inverter. The inverter can be powered from the
main junction box (fuse number 37).
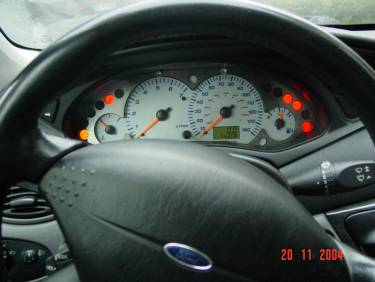
This is the day view.
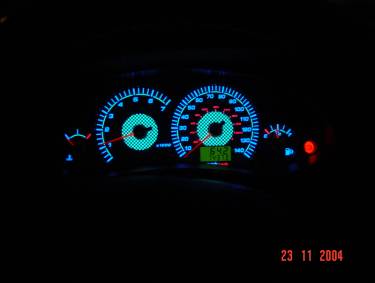
This is the night view.
Now, the next step is to
change the color of the odometer LCD. The green panel MUST be blue J
To do this, the instrument
cluster must be removed and taken apart again. There is a backplate behind the
LCD panel. It is a diffusor and green sheet at the same time. Using fine
sandpaper the back green coating must be removed. This coating must be replaced
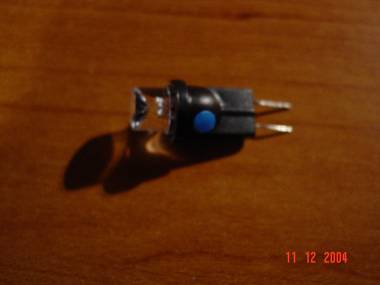
by thin blue electrical tape. And finally a special blue LED must be soldered
instead of the corresponding backlight of the instrument cluster.
This is the special blue
LED
... and the result
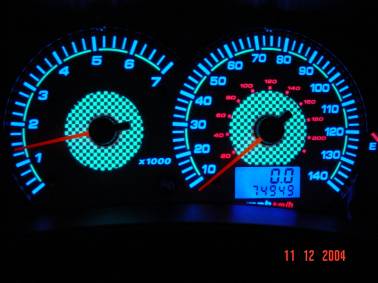
That’s nice... J